My current Logstash template — 2015-08-31

I figured it was time to share my current template again, as much has changed since Logstash 1.2.  Among the changes include:

  1. doc_values everywhere applicable
  2. Defaults for all numeric types, using doc_values
  3. Proper mapping for the raw sub-field
  4. Leaving the message field analyzed, and with no raw sub-field
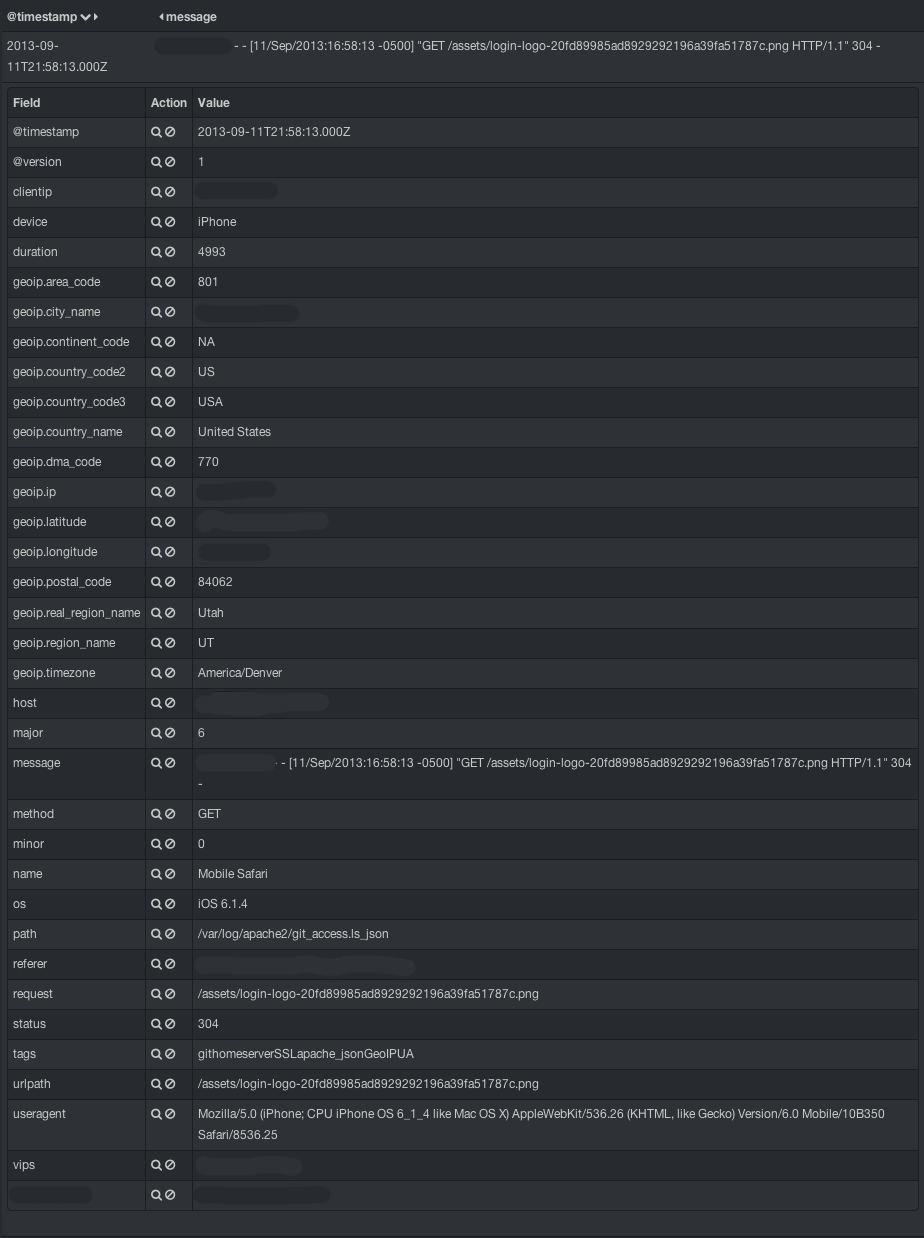
  5. Added ip, latitude, and longitude fields to the geoip mapping, using doc_values

If you couldn’t tell, I’m crazy about doc_values.  Using doc_values (where permitted) prevents your elasticsearch java heap size from growing out of control when performing large aggregations—for example, a months worth of data with Kibana—with very little upfront cost in additional storage.

This is mostly generic, but it does have a few things which are specific to my use case (like the Nginx entry).  Feel free to adapt to your needs.

{
  "template" : "logstash-*",
  "settings" : {
    "index.refresh_interval" : "5s"
  },
  "mappings" : {
    "_default_" : {
       "_all" : {"enabled" : true, "omit_norms" : true},
       "dynamic_templates" : [ {
         "message_field" : {
           "match" : "message",
           "match_mapping_type" : "string",
           "mapping" : {
             "type" : "string", "index" : "analyzed", "omit_norms" : true
           }
         }
       }, {
         "string_fields" : {
           "match" : "*",
           "match_mapping_type" : "string",
           "mapping" : {
             "type" : "string", "index" : "analyzed", "omit_norms" : true,
               "fields" : {
                 "raw" : {"type": "string", "index" : "not_analyzed", "doc_values" : true, "ignore_above" : 256}
               }
           }
         }
       }, {
         "float_fields" : {
           "match" : "*",
           "match_mapping_type" : "float",
           "mapping" : { "type" : "float", "doc_values" : true }
         }
       }, {
         "double_fields" : {
           "match" : "*",
           "match_mapping_type" : "double",
           "mapping" : { "type" : "double", "doc_values" : true }
         }
       }, {
         "byte_fields" : {
           "match" : "*",
           "match_mapping_type" : "byte",
           "mapping" : { "type" : "byte", "doc_values" : true }
         }
       }, {
         "short_fields" : {
           "match" : "*",
           "match_mapping_type" : "short",
           "mapping" : { "type" : "short", "doc_values" : true }
         }
       }, {
         "integer_fields" : {
           "match" : "*",
           "match_mapping_type" : "integer",
           "mapping" : { "type" : "integer", "doc_values" : true }
         }
       }, {
         "long_fields" : {
           "match" : "*",
           "match_mapping_type" : "long",
           "mapping" : { "type" : "long", "doc_values" : true }
         }
       }, {
         "date_fields" : {
           "match" : "*",
           "match_mapping_type" : "date",
           "mapping" : { "type" : "date", "doc_values" : true }
         }
       } ],
       "properties" : {
         "@timestamp": { "type": "date", "doc_values" : true },
         "@version": { "type": "string", "index": "not_analyzed", "doc_values" : true },
         "clientip": { "type": "ip", "doc_values" : true },
         "geoip"  : {
           "type" : "object",
           "dynamic": true,
           "properties" : {
             "ip": { "type": "ip", "doc_values" : true },
             "location" : { "type" : "geo_point", "doc_values" : true },
             "latitude" : { "type" : "float", "doc_values" : true },
             "longitude" : { "type" : "float", "doc_values" : true }
           }
         }
       }
    },
    "nginx_json" : {
      "properties" : {
        "duration" : { "type" : "float", "doc_values" : true },
        "status" : { "type" : "short", "doc_values" : true }
      }
    }
  }
}

 
You can also find this in a GitHub gist.
 
Feel free to add any suggestions, or adaptations you may have used in the comments below!
 

Getting Apache to output JSON (for logstash 1.2.x)

Greetings, travelers, who may have come to this page by way of my other page on this subject, dealing with the same subject matter, but with logstash version 1.1.x.

Logstash 1.2.1 is brand new as of this edition.  The changes to my Apache CustomLog JSON recipe are in! I’ve even since updated this page to not use the prune filter but exclusively use the new logstash conditionals.

Apache configuration:

LogFormat "{ 
            "@timestamp": "%{%Y-%m-%dT%H:%M:%S%z}t", 
            "@version": "1", 
            "vips":["vip.example.com"], 
            "tags":["apache"], 
            "message": "%h %l %u %t \"%r\" %>s %b", 
            "clientip": "%a", 
            "duration": %D, 
            "status": %>s, 
            "request": "%U%q", 
            "urlpath": "%U", 
            "urlquery": "%q", 
            "bytes": %B, 
            "method": "%m", 
            "referer": "%{Referer}i", 
            "useragent": "%{User-agent}i" 
           }" ls_apache_json
CustomLog /var/log/apache2/logstash_test.ls_json ls_apache_json

Logstash configuration:

input {
   file {
      path => "/var/log/apache2/*.ls_json"
      tags => "apache_json"
      codec => "json"
   }
}

filter {
    geoip {
	add_tag => [ "GeoIP" ]
	database => "/opt/logstash/GeoLiteCity.dat"
	source => "clientip"
    }
    if [useragent] != "-" and [useragent] != "" {
      useragent {
        add_tag => [ "UA" ]
        source => "useragent"
      }
    }
    if [bytes] == 0 { mutate { remove => "[bytes]" } }
    if [geoip][city_name]      == "" { mutate { remove => "[geoip][city_name]" } }
    if [geoip][continent_code] == "" { mutate { remove => "[geoip][continent_code]" } }
    if [geoip][country_code2]  == "" { mutate { remove => "[geoip][country_code2]" } }
    if [geoip][country_code3]  == "" { mutate { remove => "[geoip][country_code3]" } }
    if [geoip][country_name]   == "" { mutate { remove => "[geoip][country_name]" } }
    if [geoip][latitude]       == "" { mutate { remove => "[geoip][latitude]" } }
    if [geoip][longitude]      == "" { mutate { remove => "[geoip][longitude]" } }
    if [geoip][postal_code]    == "" { mutate { remove => "[geoip][postal_code]" } }
    if [geoip][region_name]    == "" { mutate { remove => "[geoip][region_name]" } }
    if [geoip][time_zone]      == "" { mutate { remove => "[geoip][time_zone]" } }
    if [urlquery]              == "" { mutate { remove => "urlquery" } }

    if "apache_json" in [tags] {
        if [method]    =~ "(HEAD|OPTIONS)" { mutate { remove => "method" } }
        if [useragent] == "-"              { mutate { remove => "useragent" } }
        if [referer]   == "-"              { mutate { remove => "referer" } }
    }
    if "UA" in [tags] {
        if [device] == "Other" { mutate { remove => "device" } }
        if [name]   == "Other" { mutate { remove => "name" } }
        if [os]     == "Other" { mutate { remove => "os" } }
    }
}

output {
     elasticsearch {
       host => "elasticsearch.example.com"
       cluster => "elasticsearch"
     }
}

So let’s analyze these. The apache configuration now has no nesting in @fields (and there was much rejoicing), so it is considerably less cluttered. We’re writing to file here, and making the file end in ls_json (for convenience’s sake). Aside from this, there’s almost nothing different here between 1.1.x and 1.2.x configuration.

In the logstash configuration there are some big changes under the hood. Let’s look at the input first:

input {
   file {
      path => "/var/log/apache2/*.ls_json"
      tags => "apache_json"
      codec => "json"
   }
}

It’s clear we’re tailing a file here, still, so that’s the same. We’re appending the tag “apache_json” for ourselves. I opted to do this because there may be some non-json files I can’t consume this way and I want to differentiate.

The big difference here is codec. In the old example we had format => “json_event” for pre-formatted content. In Logstash 1.2.x you use a codec definition to accomplish this, but it’s not a json_event any more. The only reserved fields in logstash now are @timestamp and @version. Everything else is open.

Moving on to the filters now:

    geoip {
	add_tag => [ "GeoIP" ]
	database => "/opt/logstash/GeoLiteCity.dat"
	source => "clientip"
    }

The GeoIP filter is a wonderful addition since the early days of logstash. I won’t do more than provide a link and a basic description here. It extracts all kinds of useful data about who is visiting your web server: countries, cities, timezone, latitude and longitude, etc. Not every IP will populate every field, but we’ll get to that a bit later. Use the “source” directive to specify which field holds the IP (or host) to provide to the GeoIP filter.

    if [useragent] != "-" and [useragent] != "" {
      useragent {
        add_tag => [ "UA" ]
        source => "useragent"
      }
    }

Awesome new Logstash feature: Conditionals. Conditionals finally provide the kind of if/then/else logic that allows you to do amazing things (and probably some pretty mundane things too, ed.). Follow the link and read up on it. I’ll follow the simple flow here a bit. If the field useragent (fields are encapsulated in square braces) is not a hyphen, and is also not empty, then perform the action, which is another filter: useragent. The useragent filter breaks down a useragent string, like “Mozilla/5.0 (iPhone; CPU iPhone OS 6_1_4 like Mac OS X) AppleWebKit/536.26 (KHTML, like Gecko) Version/6.0 Mobile/10B350 Safari/8536.25” into useful fields, like device, os, major, minor, and name. If it can’t find the answer to some of these, it will populate them with “Other,” which I don’t want. So to save me some trouble, I will prevent this from happening by using the conditional. If it does succeed I will tag it with “UA” and it will parse the “useragent” field.

if [bytes] == 0 { mutate { remove => "[bytes]" } }

Another conditional here. Logstash will check to see if the bytes field is 0. If it is, it will remove the bytes field. This is more about clutter removal than anything else.

The remaining simple “remove” statement for empty GeoIP fields should be pretty simple to follow. One thing to note is that nested fields must be encapsulated as above within square braces, e.g. [geoip][postal_code], for proper parsing.

if "apache_json" in [tags] {
        if [method]    =~ "(HEAD|OPTIONS)" { mutate { remove => "method" } }
        if [useragent] == "-"              { mutate { remove => "useragent" } }
        if [referer]   == "-"              { mutate { remove => "referer" } }
    }

Here we are checking to see if the tag “apache_json” is in the array “tags” before proceeding with other conditionals. Note that the check for “method” is using a regular expression, so it uses =~ instead of ==, and is seeing if the entry is for either “HEAD” or “OPTIONS” and will remove the “method” field in either case.

If you are especially observant you may have noticed that there is no date filter in this example, though there was in the 1.1.x example linked above. The reason here is that the timestamp is already properly formatted in ISO8601 and logstash can see that and uses it automatically. This saves a few cycles and keeps the configuration file appearing clean and orderly.

output {
     elasticsearch {
       host => "elasticsearch.example.com"
       cluster => "elasticsearch"
     }

And we can’t let all of this expanded data go to waste, now can we. So we ship it out to elasticsearch where Kibana can get to it. Let’s take a quick look at what it looks like:
logstash_json_capture
I’ve anonymized some of the data, but you can see that there are many more fields than just those few we capture from apache.

So, that’s my updated rendition of getting Apache to put JSON into logstash directly. What do you think?

I would love to hear your comments, corrections and ideas.

How a search engine saved my air conditioner

Of course, that is only partially true.  The search engine really only saved me money from having to have a service technician come to my house to do a 10 minute repair.

“So what happened?” you might ask.  I was working in my office at home.  It seemed a bit warm, but it was 105°F/40.6°C outside.  It was when I walked past my thermostat and saw that it read 78°F/25.6°C that I was a bit concerned.  Typically, we keep it set to 74°F/23.3°C during the summer months.  It was too warm.  The internal fan was on, but the air circulating was ambient.  I went outside and the compressor/condenser had the fan on, but clearly the compressor was not functioning.  I despaired.  Fortunately, our house has 2 units: one for upstairs where we sleep, and one for downstairs where we eat and work.  The failed unit was for the downstairs.  Even seeing that it was 8:30PM, I began searching for repair professionals.  One even had hours until 10pm!  Nobody could see me until Friday, however.  The heat wave here in Texas was hitting everyone pretty hard.

I am not one to take this sort of thing lying down.  I started searching for “compressor doesn’t turn on” and other associated search terms, “fan turns on but compressor won’t turn on.”  What I found directed me to YouTube.

Replacing a Start Run Capacitor

How to fix your AC – Fan kicks on but Compressor Not Working – Replacing run start capacitor

I did some searching through DIY sites where contractors and professionals gave advice.  I learned about run capacitors and start capacitors.  On a high-powered unit like an air conditioner they serve to help give the motors a kick-start to get them working.  After watching the video, researching the prices for these parts, and the cost to have a professional come out and look at it, I figured it was worth $35 to try, even if it wasn’t the problem.

I am happy to say that this was exactly the problem.  I ordered the part from Grainger Industrial Supply, mostly because they were nearby and had the part in stock.  It turns out that Amazon also has these in stock in various sizes and styles.  I just didn’t want to wait another day (it’s August in Texas—don’t judge me).

The instructions in the first link (Replacing a Start Run Capacitor) were exactly what worked for me, down to the shape, size and style of the unit.  I’d run through the steps again, but the video made it very clear, even if the guy was nervous and called the capacitor a “compressor” or “condenser” erroneously a few times (he even laughs about it in the comments below the video).

Needless to say, I’m no expert at this.  I know enough to know how to search, what to search for, and how to safely experiment with electrical components.  Your mileage may vary, but I just saved $200.00 and another day of waiting and working in an uncomfortably warm office.

Unconventional Zabbix: Part 1 — Extended External Monitoring

Zabbix 2.2 will be the first version which will allow web scenario templating. But in the days of 1.6, 1.8 and 2.0, I had (still have) serious shortcomings in web monitoring to overcome. I had hundreds of URLs which needed monitoring with a large bulk of them being nearly identical, or at least having identical test URL responses. I had perhaps 5 basic URL types, of which one type alone was over 80% of the sample pool.

Using Zabbix’s native URL monitoring I would have spent hours, perhaps days, entering in each URL, each grep string, each potential response code, just to create the items. After that I’d still have to create triggers (though this part would be largely copy/clone-able). There had to be another way which would allow me to save time and preserve my sanity. Enter custom external monitoring.

Zabbix allows customized external monitoring with a few provisos: Do not overuse external checks! It can decrease performance of the Zabbix system a lot.  I have done some digging and found the reasoning behind this, and found a work-around for the aforementioned “decrease” in performance.

In ordinary Zabbix checks, after a database call for parameters, the call to the remote machine is initiated from within the Zabbix binary (already running).  It’s just a network call.  For an external check, Zabbix must spawn a shell and wait for the exit code to that process before it can free up resources and return the value.  Imagine what happens if you have hundreds of these per minute!  Zabbix could—and likely would—get held up.  The simplest response to this is to make Zabbix call a wrapper script as the external script.  The wrapper script will do little or no processing, pass the args to the actual process and run with an appended ampersand (&) to background the “actual” process and give a near-immediate return.  The “actual” script will send the values back as trapper type using zabbix_sender.  By using this method, I am able to process hundreds of new values per minute in 100% external script setups.

The only down side to this setup that I can ascertain is that I am tracking a Zabbix item whose only purpose is to initiate the external script (the wrapper).  I technically don’t need to have a trigger watching this item as it is always likely to have a zero as its return code (backgrounded shell).  This logic can be extended to a number of other clever tests, such as SSL certificate expiration watching and SSL certificate chain validation.  I will share these in a different post as this post is more about the methodology than the implementation.

The Logstash Book

Get “The Logstash Book

No, I am not the author. I am, however, in the credits on page 1, with links and examples drawn from some of the content on this site. The author, James Turnbull, approached me and asked if it would be okay to do so and I agreed (of course!).

If you are just learning about Logstash, Elasticsearch and Kibana, this is the book for you. I’ve read through its pages. This is the book I wish I’d had a year and a half ago when I first started with Logstash in its infancy. A lot of what you will find in this book is the result of Jordan and the Logstash community’s hard work since then to make Logstash more user-friendly and accessible. You’ll be a Logstash maven in no time if you follow the basics in this book. The book even shows the basics of extending Logstash by adding your own plugins. Who knows? Maybe you’ll become a Logstash contributor too!

This is the first book published on Logstash, and it’s worth every penny of the inexpensive $9.99 asking price. Get it now, and get started with Logstash!

Disclaimer: I am not receiving any royalties to review or recommend this book. It succeeds on its own merits and I am pleased to be associated with it in any way.

Introducing zoop

Drumroll please…

Introducing… zoooooooop!

I got sick of hard-coding calls to the python Zabbix API module (https://github.com/gescheit/scripts), so I wrote zoop: Zabbix Object-Oriented Python.

With zoop, I have made (and will continue to add) classes, or objects if you will, of Zabbix API calls. Need to create a new item?

from zoop import *

api = zoop(url='http://www.example.com/zabbix', username='zabbixusername', password='zabbixpassword')
host = api.host()
host.get(name='zabbix.example.com')


The .get() method will fill the object with the API information, if the host exists (will search by either host, name or hostid)
Once filled, the host object behaves like a python dict type, so you can call the values or set them like this: host[“hostid”]

item = api.item()
item["hostid"] = host["hostid"]
item["key_"] = 'myitemkey'
item["other item values"] = etc.

There is a .get() method for items as well, e.g. item.get(key_=’my_item_key’, hostid=host[“hostid”]), which will fill the item object with values from the API.

Please feel free to browse the source. There is a LOT that could be done here to extend this and make it better, and encompass more API calls. This is just for starters!

zoop is available at https://github.com/untergeek/zoop

The Zabbix Grab-Bag

I finally created a repository on GitHub for all of my Zabbix scripts (or, if you want to go directly to the repository: https://github.com/untergeek/zabbix-grab-bag)

This is the culmination of a dream that started a few years ago. I wanted a way to share my scripts in a way that others would be able to both use and improve them. GitHub is the chosen vessel.

Rather than making this a true project, I envision it as more of a “grab-bag” of projects/scripts/templates from myself and others. And you should be able to license your own scripts however you want, too.

So check it out! Contribute! Let’s make Zabbix even more awesome!

ls-zbxstatsd – Part 1: Wrangling a zabbix key from a statsd key string.

I have just forked zbx-statsd from github into ls-zbxstatsd.

The reason for this is that zbx-statsd was not compatible with the format coming from logstash’s statsd output plugin.

Statsd format is simply “key:value|[type]”.
In logstash, “key” is different, and the format becomes “namespace.sender.’whatever you named it in the statsd output plugin’:value|[type]”. Things get more complicated when you need to split an already period-delimited “key” and figure out which part is which. What if the “sender,” which is the zabbix host you want the metrics to be stored under, is a period-delimited FQDN?

This was too much to handle so I added a delimiter. Double semicolons. With this, the format sent from logstash now looks like “namespace.sender;;.’whatever you named it in the statsd output plugin’:value|[type]”. This is much more easy to split.

For now, I strip the namespace altogether. I don’t need it, and while it might be useful later, I couldn’t think of a reason to keep it, so my script expects the default “logstash” and strips that out. If you’re using this script at this time, don’t change the default namespace, or expect to edit the code. Now I’m left with “sender;;.’whatever you named it in the statsd output plugin’:value|[type]”, where:

  • sender = zabbix host
  • ‘whatever you named it in the statsd output plugin’ = item key

With the double semicolons I can easily separate the zabbix host name from the zabbix key, even if there are many periods in each.

With the resolution of this, it was time for stage two: Automatic item creation.

DEPRECATED! My current template/mapping

Update 2015-08-31: My most recent template/mapping can be found here.

2013-11-07: Another year, and things in the Logstash and Elasticsearch have grown and changed considerably.  I am now employed by Elasticsearch to work on Logstash.  This was one of the first things they wanted me to work on.  So I am announcing that a new and improved, Logstash v1.2+ compatible mapping template is coming.  It will not be on my personal site, however.  It will be on http://www.elasticsearch.org in the main documentation there.  I will paste the link here as soon as it’s available.  In the interim, you can find a Github gist version here.

Expect this post to get updated from time to time. You can come back here to check out what I’m using and why.

2012-11-05: I now map IP addresses (clientip field) as type IP to allow for range searches. I also map the fields in the geoip filter output to allow for non-analyzed terms facet output (allows full city names with spaces; proper capitalization, etc.)

DO NOT USE THIS with Logstash v1.2+.  This is deprecated and remains here as an archived example!

curl -XPUT http://localhost:9200/_template/logstash_per_index -d '
{
    "template" : "logstash*",
    "settings" : {
        "number_of_shards" : 4,
        "index.cache.field.type" : "soft",
        "index.refresh_interval" : "5s",
        "index.store.compress.stored" : true,
        "index.query.default_field" : "@message",
        "index.routing.allocation.total_shards_per_node" : 4
    },
    "mappings" : {
        "_default_" : {
            "_all" : {"enabled" : false},
            "properties" : {
               "@fields" : {
                    "type" : "object",
                    "dynamic": true,
                    "path": "full",
                    "properties" : {
                        "clientip" : { "type": "ip" },
                        "geoip" : {
                            "type" : "object",
                            "dynamic": true,
                            "path": "full",
                            "properties" : {
                                    "area_code" : { "type": "string", "index": "not_analyzed" },
                                    "city_name" : { "type": "string", "index": "not_analyzed" },
                                    "continent_code" : { "type": "string", "index": "not_analyzed" },
                                    "country_code2" : { "type": "string", "index": "not_analyzed" },
                                    "country_code3" : { "type": "string", "index": "not_analyzed" },
                                    "country_name" : { "type": "string", "index": "not_analyzed" },
                                    "dma_code" : { "type": "string", "index": "not_analyzed" },
                                    "ip" : { "type": "string", "index": "not_analyzed" },
                                    "latitude" : { "type": "float", "index": "not_analyzed" },
                                    "longitude" : { "type": "float", "index": "not_analyzed" },
                                    "metro_code" : { "type": "float", "index": "not_analyzed" },
                                    "postal_code" : { "type": "string", "index": "not_analyzed" },
                                    "region" : { "type": "string", "index": "not_analyzed" },
                                    "region_name" : { "type": "string", "index": "not_analyzed" },
                                    "timezone" : { "type": "string", "index": "not_analyzed" }
                            }
                        }
                    }
               },
               "@message": { "type": "string", "index": "analyzed" },
               "@source": { "type": "string", "index": "not_analyzed" },
               "@source_host": { "type": "string", "index": "not_analyzed" },
               "@source_path": { "type": "string", "index": "not_analyzed" },
               "@tags": { "type": "string", "index": "not_analyzed" },
               "@timestamp": { "type": "date", "index": "not_analyzed" },
               "@type": { "type": "string", "index": "not_analyzed" }
            }
        }
    }

}
'